

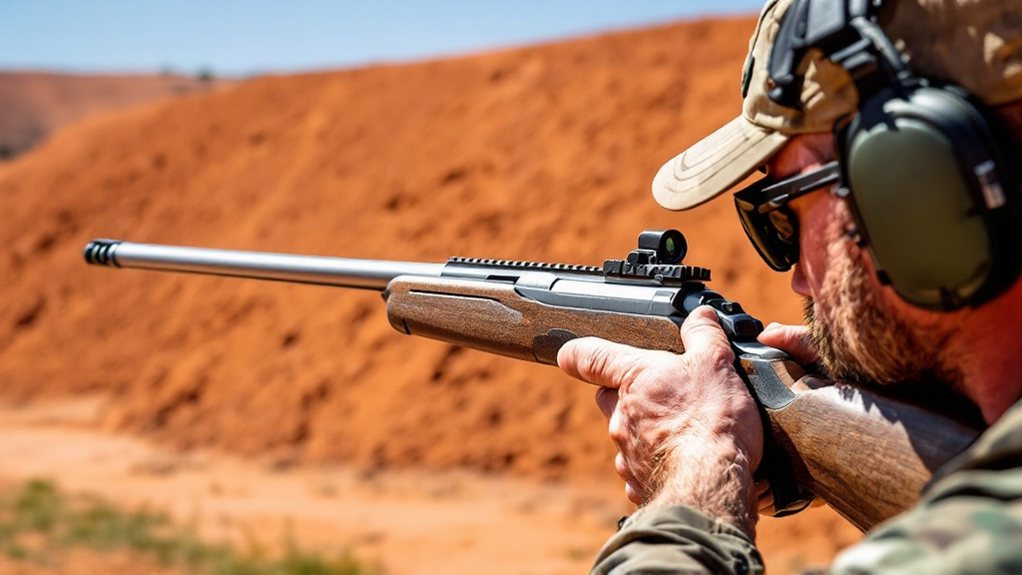
Keep your muzzle pointed in a safe direction by maintaining a 45-degree comfort zone on either side. You’ll need a firm, two-handed grip with your dominant hand high on the backstrap and support hand filling remaining space. Always keep your trigger finger indexed along the frame until ready to shoot. Position your feet shoulder-width apart, leaning slightly forward to manage recoil. Master these foundational controls through deliberate practice before advancing to more complex techniques.
Key Takeaways
- Always maintain a 45-degree safe zone on either side of your muzzle direction, never allowing it to cross your body or others.
- Grip the firearm firmly with both hands high on the backstrap, keeping thumbs aligned forward for maximum control.
- Keep your trigger finger straight along the frame until ready to shoot, maintaining positive control at all times.
- Lean slightly forward with knees bent and weight distributed evenly to manage recoil and maintain steady muzzle control.
- Practice proper draw-to-target transitions while keeping the muzzle pointed downrange throughout the entire sequence.
Mastering the Safe Muzzle “Comfort Zone”
When handling any firearm, establishing your safe muzzle “comfort zone” serves as the foundation for responsible gun handling. You’ll need to maintain constant awareness of where your muzzle points, keeping it directed in a safe direction at all times. Your comfort zone extends approximately 45 degrees to either side and should never cross any part of your body or others.
To maintain proper control, grip the firearm firmly while anticipating muzzle flip and recoil management. Position your stance to accommodate the natural arc of the muzzle during firing, ensuring it stays within your predetermined safe zone. Remember that your muzzle comfort zone changes based on your environment – what’s safe at a controlled range mightn’t be safe elsewhere. Always adjust your zone parameters according to your surroundings while maintaining strict safety protocols.
Proper Grip Techniques for Muzzle Direction
A proper grip forms the cornerstone of maintaining consistent muzzle direction and control. You’ll need to firmly grasp your firearm with both hands, ensuring your dominant hand maintains high placement on the backstrap while your support hand fills the remaining grip space. Keep your thumbs aligned and pointing forward, parallel to the barrel.
When establishing your hand grip, wrap your fingers securely but don’t squeeze so tightly that you create unnecessary tension or tremors. Your grip pressure should be about the same as you’d use to firmly shake someone’s hand. This balanced pressure helps you maintain steady muzzle control while still allowing for natural point of aim adjustments. Remember that your grip directly affects where your muzzle points, so consistency in your hand placement is crucial for safe firearm handling.
Essential Trigger Finger Placement Rules
You’ll need to keep your trigger finger completely off the trigger and outside the trigger guard until you’re ready to shoot. When your finger isn’t actively engaged with the trigger, position it straight and firmly along the frame of the firearm, maintaining positive control while avoiding any unintentional trigger contact.
Your index finger serves as your primary point of control, allowing you to maintain weapon readiness while adhering to fundamental safety protocols.
Keep Off Until Ready
Proper trigger finger discipline stands as the cornerstone of firearm safety. Your trigger finger must remain off the trigger and straight along the frame until you’ve made the conscious decision to shoot. Make sure your index finger stays outside the trigger guard, resting alongside the receiver, whenever you’re handling the firearm but not actively engaging a target.
This fundamental rule prevents unintentional discharges that could occur from startling, losing balance, or experiencing involuntary muscle contractions.
When you’re ready to shoot, deliberately move your trigger finger inside the guard and onto the trigger face. Once you’ve completed firing, immediately return your finger to its indexed position outside the trigger guard. This habit becomes automatic with consistent practice and reinforces your commitment to safe firearm handling.
Straight Along Frame Position
The straight-along-frame position involves placing your index finger parallel to the firearm’s receiver, maintaining firm contact while keeping the digit fully extended. This proper positioning ensures you’re ready to move straight back to the trigger when needed, while significantly reducing the risk of accidental discharge during firearm manipulation.
When adopting this position, you’ll experience several crucial safety benefits:
- You’ll maintain complete control during recoil management
- Your muscle memory will develop proper trigger discipline
- You’ll minimize the chance of sympathetic finger flexing
- You’ll have faster, more deliberate trigger access when required
Remember to keep your finger straight and in firm contact with the frame until you’ve made the conscious decision to fire. This fundamental position forms the foundation of safe firearm handling and precise shot placement.
Index Point of Control
Building upon straight-along-frame positioning, mastering index point of control represents a foundational aspect of trigger finger discipline. Your index finger must remain straight and rested along the frame until you’re ready to shoot, keeping it outside the trigger guard at all times during non-firing moments.
When establishing your grip and stance, position your trigger finger high on the frame, parallel to the barrel. This placement provides optimal muzzle control while preventing unintentional trigger contact. You’ll maintain this index position during all firearm manipulations: loading, unloading, moving, or addressing malfunctions. Only when you’ve acquired your target and made the conscious decision to shoot should you move your finger to the trigger. This disciplined approach ensures both safety and shooting precision while reinforcing proper muscle memory.
Safe Holster-to-Target Transitions
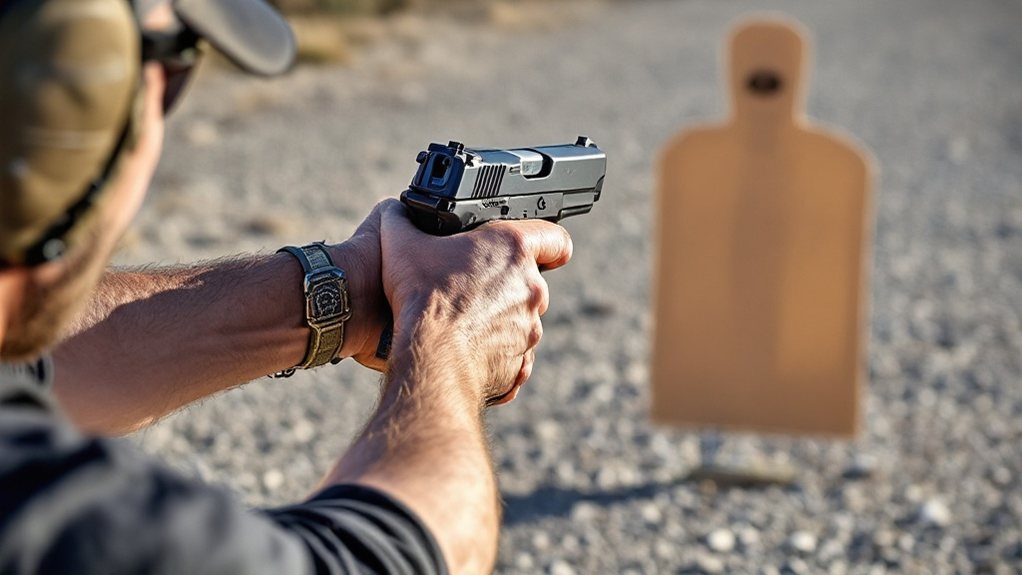
Moving from holster to target requires strict adherence to fundamental safety protocols throughout the entire draw sequence. Your finger is always positioned along the slide until you’ve made the conscious decision to shoot. Only when your sights align with the intended target should you consider trigger pull.
Practice these critical safety elements:
- Keep your trigger finger indexed high on the frame until ready to engage
- Maintain muzzle direction downrange throughout the entire draw stroke
- Control garment clearance to prevent snags or entanglement
- Establish a consistent grip before leaving the holster
Master these fundamentals through deliberate dry-fire practice before attempting live-fire draws. When executed properly, a safe draw sequence becomes muscle memory, allowing you to focus on target engagement while maintaining essential safety protocols.
Body Positioning for Optimal Muzzle Control
Position your feet shoulder-width apart to establish a stable foundation, with roughly 60% of your weight distributed forward on the balls of your feet.
You’ll want to lean slightly forward at the waist while keeping your shoulders squared to the target, creating a fighting stance that helps absorb recoil.
Your upper body should maintain proper vertical alignment from hips through shoulders, avoiding any backward lean that could compromise your muzzle control.
Stance Width and Balance
A proper shooting stance begins with your feet positioned shoulder-width apart, creating a solid foundation for muzzle control. Your body weight should be evenly distributed, preparing you for the shot would recoil creates. Lean slightly forward from your ankles while keeping your core engaged to maintain stability.
For maximum control and balance, remember these critical elements:
- Position your dominant foot slightly forward, toes pointing outward
- Keep your knees slightly bent but not locked
- Lean from your ankles, not your waist
- Maintain an active core to stabilize your upper body
This balanced stance forms your shooting platform’s foundation, enabling you to control muzzle movement effectively. Remember to square up to your target while keeping your feet slightly angled outward for optimal stability and recoil management.
Forward Weight Distribution
Your balanced stance sets the stage for proper forward weight distribution, which directly affects your ability to manage recoil and maintain consistent muzzle control. Shift your weight slightly forward onto the balls of your feet while keeping your back straight and shoulders positioned directly over your hips. This positioning creates a stable foundation that helps you control a lot of the muzzle rise during shooting.
Maintain an upright, squared posture while avoiding the tendency to lean back against recoil. Your arms should form an isosceles triangle with elbows parallel to the ground, but don’t lock them – let them work as natural shock absorbers. Remember to drive your support hand thumb forward along the frame while maintaining consistent grip tension. These elements work together to create an efficient recoil management system for better shot control.
Upper Body Alignment
While establishing proper stance provides the foundation, effective upper body alignment plays a crucial role in maintaining consistent muzzle control. Your arms should form an isosceles triangle, with elbows unlocked and parallel to the ground, bringing the firearm naturally to eye level. This positioning gives you a better chance to move the sights efficiently while maintaining stability.
For optimal upper body alignment:
- Keep your torso squared up to the target, creating a strong, balanced platform
- Drive both thumbs forward while maintaining overlapping finger placement
- Create natural tension between your arms without fighting against each other
- Position your elbows parallel to the ground, avoiding locked joints
This systematic approach to upper body alignment ensures consistent sight picture and enhances your ability to control muzzle movement during both target acquisition and recoil management.
Managing Muzzle Direction During Reloads
Maintaining proper muzzle control during reloads represents a critical aspect of safe firearms handling. When performing magazine changes or clearing malfunctions, you’ll need to keep your firearm pointed in a safe direction within your personal comfort zone. Always maintain the muzzle parallel to the ground, never allowing it to drop below waist level.
As you transition from holster to target position, ensure you’re consistently controlling the muzzle direction. Develop the habit of keeping your firearm oriented in a safe direction throughout all manipulations. This practice helps you manage recoil effectively and maintain awareness of your muzzle’s orientation.
When you allow the recoil to affect your stance, it’s crucial to maintain proper muzzle discipline. By establishing these fundamental handling habits during training, you’ll build muscle memory for safe and efficient reloads.
Training Drills for Muzzle Awareness

Keep your trigger press smooth and consistent while moving between firing positions, as erratic pressure can destabilize your muzzle control.
You’ll enhance your follow-through by maintaining visual focus on your target through recoil and resetting your sights quickly for subsequent shots.
Practice returning to your original firing stance after movement drills to build muscle memory for proper muzzle orientation and reinforce safe handling habits.
Trigger Press During Movement
To develop effective trigger control during dynamic shooting scenarios, you’ll need to master specific movement-based drills that challenge both your trigger press and muzzle awareness. Every time you practice, focus on achieving less muzzle movement while maintaining precise trigger control.
- Your life may depend on smoothly drawing and firing from unconventional positions
- Proper technique builds the muscle memory that could save you in critical moments
- Reactive targets provide immediate feedback on your muzzle discipline
- Video analysis reveals subtle flaws you might otherwise miss
Incorporate lateral movements and angular transitions into your training routine while maintaining steady trigger pressure. This combination of movement and shooting helps develop the coordination needed for real-world scenarios. Record your sessions and analyze your technique, paying close attention to how your muzzle position changes during dynamic movements.
Follow-Through Vision Exercises
Follow-through vision exercises form a critical foundation for developing consistent muzzle awareness and improving shot accuracy. The first thing you’ll want to practice is maintaining sight alignment even after breaking your shot. Try to go through dry fire drills where you hold your sight picture for 2-3 seconds after pressing the trigger.
When conducting live-fire training, visually confirm your muzzle’s position after each shot. This builds muscle memory and reinforces proper control habits. Practice shooting from various positions, including kneeling and prone, while tracking your muzzle throughout position changes. You’ll enhance your overall muzzle discipline through these transitions.
For advanced practice, incorporate multiple shot strings where you focus on rapid sight reacquisition while maintaining consistent muzzle direction. This develops your ability to control muzzle movement during sustained firing sequences.
Reset Position Drills
Mastering reset position drills represents a fundamental step in developing reliable muzzle control. As you manage recoil energy, focus on returning your muzzle to the exact same point on target after each shot. This consistent push back to your original sight picture builds crucial muscle memory for follow-up accuracy.
You’ll feel more confident as your muzzle awareness improves. You’ll develop a natural rhythm in your shooting cadence. You’ll notice enhanced accuracy in rapid-fire scenarios. You’ll experience smoother transitions between multiple targets.
Start with dry fire practice to perfect your reset technique without ammunition costs. As you train, concentrate on maintaining the same sight alignment and body position throughout each repetition. Make reset position drills a core component of your regular practice sessions to significantly improve your overall shooting performance and muzzle control capabilities.
Common Muzzle Control Mistakes to Avoid
When handling firearms, even experienced shooters can make dangerous muzzle control mistakes that compromise safety. The most critical issues with muzzle direction include sweeping others while turning, pointing the barrel skyward during loading, and letting the muzzle drop below the target during recoil management.
You’ll need to maintain constant awareness of your muzzle’s direction, especially when moving or transitioning between targets. Don’t let the amount of recoil surprise you into losing control – maintain a firm grip and proper stance. Never rely on your firearm’s safety mechanism as a substitute for proper muzzle discipline.
Keep your finger off the trigger until you’re ready to shoot, and always treat the muzzle as if it’s loaded, even when you’re certain it isn’t.
Range Safety Officer Guidelines for Muzzle Control
Range Safety Officers enforce strict muzzle control protocols to protect all shooters and range personnel. You’ll need to spend a lot of time mastering proper muzzle discipline under their guidance. Let the gun remain parallel to the ground within your comfort zone – between your nose and upper chest area.
Never sweep the muzzle across other shooters or range personnel. Keep your trigger finger indexed until you’re ready to engage targets. Maintain muzzle awareness during all firearm manipulations. Report any unsafe muzzle direction to the Range Safety Officer immediately.
When performing tasks like loading, unloading, or clearing malfunctions, keep the firearm oriented within your comfort zone. RSOs will ensure you don’t point the muzzle downward without proper control and supervision. Remember: every firearms manipulation must prioritize keeping the muzzle in a safe direction.
Building Consistent Muzzle Control Habits

Building reliable muzzle control habits requires dedicated practice with both fundamental techniques and supportive equipment. You’ll need to develop a repeatable grip technique that maintains consistent wrist and forearm tension while managing recoil. Start with dry-fire training to master your stance and body positioning before progressing to live-fire sessions.
| Training Phase | Focus Area | Key Outcome |
|---|---|---|
| Foundation | Grip & Stance | Stability Base |
| Development | Dry Fire | Muscle Memory |
| Implementation | Live Fire | Recoil Control |
| Optimization | Equipment | Enhanced Control |
Test different ammunition loads to find what works best with your firearm’s characteristics. Consider adding supportive accessories like muzzle brakes or bipods to enhance your control. Remember to maintain the same grip tension and body position during each practice session to build reliable muscle memory and shooting mechanics.
Frequently Asked Questions
What Is the Best Muzzle Control Carry?
You’ll achieve optimal muzzle control by maintaining your firearm parallel to the ground within your comfort zone, positioned between your nose and upper chest. Keep your proper grip positioning consistent while ensuring the muzzle stays level.
Don’t let the firearm angle downward or upward during carry. When transitioning or manipulating your weapon, maintain these muzzle control techniques while keeping your trigger finger indexed along the frame until you’re ready to shoot.
Does Muzzle Rise Affect Accuracy?
Yes, muzzle rise significantly affects your accuracy by disrupting your sight picture and shot placement. When you fire, the upward recoil force pushes your muzzle up, making follow-up shots more challenging.
To counter this, you’ll need proper recoil management techniques like a firm grip, stable stance, and controlled trigger pull. Effective muzzle positioning techniques, including proper shoulder positioning and lean-in stance, help you maintain better control and improve your shot-to-shot consistency.
Does a Light Reduce Muzzle Flip?
Properly positioned pistol lights can help reduce muzzle flip, but they’re not a primary solution. While adding weight forward of the trigger guard provides some counterbalance to recoil forces, you’ll get better results from mastering fundamental recoil management techniques and grip adjustments to reduce muzzle flip.
Your focus should be on developing proper grip strength, stance, and control. A light can complement these skills but shouldn’t be your main strategy for managing recoil.
What Causes a Muzzle Flip?
Muzzle flip occurs when your firearm recoils upward due to the explosive force of the propellant gases pushing the barrel back and up. You’ll notice this happens because the barrel sits above your grip, creating a pivot point.
When you fire, the recoil force travels through this higher axis, causing rotation. Through proper recoil management techniques and grip adjustments for stability, you can minimize this effect by maintaining firm wrist control and proper hand placement.
Conclusion
Mastering these muzzle control fundamentals will keep you and others secure while enhancing your shooting proficiency. You’ll find that consistent practice of these protocols becomes second nature, making range time more productive and enjoyable. Remember, proper muzzle discipline isn’t just about following rules—it’s about developing a safety-first mindset that serves as the foundation for all your firearms handling activities.


0 Comments